Showing posts with label Seasonal decorating (Spring). Show all posts

March 04, 2008

Crafting A Spring Wreath
We had several really bad thunderstorms roll through here last Spring, and as a result, a lot of the flowers on my Spring wreath were literally "gone with the wind!" lol Because of that I knew I would be crafting a new one this spring so I have been waiting for just the perfect sale, and this weekend I found it!! I just love the pinks, purples, and yellows mixed together. It is such a nice change from the dark days of winter.


Here's proof that I am a very MESSY crafter and this is only a small portion of my mess! When I'm in the process of making something I have the snippers snipping, the glue gun glueing, and the ribbon rolling off of the spool! You should see my floor, on second thought, maybe not! Honestly, I don't think I was made to be neat when it comes to crafts, but one's things for sure, I sure have lot's of fun doing them;o)

April 03, 2007

Bunny Napkin Ring


Isn't this cute? I got this free download from Karla Dornacher's site. I think it would be a fun little project for children to do. Of course I had to add the cotton for his tail;) They can also be used for Easter egg holders!

March 30, 2007

Creating Bunny Napkins For Your Easter Table

I love this idea because I think it adds so much charm to an Easter table. I think it looks so sweet on top of my Spring dishes! Instructions can be found here.
Kitchen Bunny
Today I set aside some time to make kitchen bunnies! We will be going out of town for Easter and I wanted to have a few little "goodies" to bring my hostess. This is a darling little bunny, functional as well as inexpensive!
Purchase a pretty dishtowel and two dishcloths (I got mine at the Dollar store)

Lay dishtowel print side down.
Fold in thirds lengthwise.
Fold in thirds again and then set aside.
Take one of the dishcloths and starting at one corner roll to the middle. Roll the opposite corner to meet it. This will be the ears.
Fold the top part of the dishtowel down about 1/3 of the way. Take the washcloth "ears" and laythem inside the fold.
Grab the ears and pull up tightly. Tie with a piece of ribbon as close to the dishtowel as you can. Make a bow.
Tie another bow under the bulge you made with the ears. This makes the head. Take the second dishcloth and roll it up just like you did the first. These will be the arms.
Slide the "arms" between the back and front of the dishtowel up to the "neck."
Tie a bow under the arms. This makes the waist.
See post below to finish making bunny.

Bring the "hands" to the front and tie the "wrists" with another bow.

Now it's time to make your poem to go along with the kitchen bunny. I used an index card that I put some stickers on and punched a hole in. I will tie it on the bunny with a pretty ribbon. In case you can't read my writing the card says:

Kitchen Bunny

I am your kitchen bunny
When you tire of me
Untie my bows and you will see
That I'm as handy as can be!


To finish her off I added a small flower and a kitchen utensil. The skies the limit with this. You could let her be holding a recipe card with a favorite recipe and then along with the bunny give the item on the recipe card, you could put in a cute little basket for her to hold, etc. . . I hope you will enjoy making these and giving them as gifts! BTW, I had to laugh when I saw the picture because the way the center of the sunflower is on her face I think she looks a little like a cyclops;)

March 22, 2007

Making Easter Eggs With Old Ties!
Okay, y'all, I was on Miss Martha's site and I watched a video showing one of the neatest and most unusual ways to decorate Easter eggs that I had ever seen. Well, of course I had to try! If you would to try you will need the following items:


Old ties, the more vibrant the color and pattern the better the egg will turn out. (Don't take one of your husband's without asking;) I asked Mr. P if he wouldn't mind looking and seeing if there was one that he didn't want that I could use. Also, I know you can literally pick them up for a dime at yard sales.
Cut approx. the bottom third of the tie off.
"Open" the bottom part up and remove any inside filling, lining, etc.. All you want left is the tie material that you see on the front.
Take a small to medium egg and with fabric "right" side to egg you will take the fabric and wrap it up as smoothly as you can until you have it nicely together at the top. Make sure that the material is nice and flat and doesn't bunch. I didn't show the following next step. Take an old white undershirt, sheet, etc. and do the same thing with that material as you did with the tie material. Cover tie material completely making sure there are no bunches and then tie with a twisty tie at the top.
Measure out at least 1/4 cup vinegar and place in a pan of water (should be glass or enamel)
Place eggs carefully in the water and heat the water to boiling. Once is starts to get to a boil you need to cut the temp down so that you have just a nice little simmer. Do this for at least twenty minutes. Once that is done and you have taken the eggs out of the water you need to let them cool completely. Unwrap eggs when cool and then rub with a little vegetable oil to make them shine. Place in a pretty bowl and then stand back and admire because you have just made some beautiful and unique Easter Eggs!! BTW, make sure you save the tie because it can be used up to five times! Here is a link to the video (it's on the right under egg dyeing techniques) so you can see how they should really turn out!
Just to give you a chuckle, I will thought I'd share this with you. I brought the eggs out onto the porch because I thought they would phograph better. I placed them "artistically" on the table ready to take the picture and the phone rings. I go in to answer and it is my sister. I sit at the kitchen table and we are having a nice chat when all of a sudden I look out the window and I see our Lab, Jake, reaching up with his mouth to have a little snack. I scream and throw the phone down and I am running after him saying, "give me back my Martha egg!" It was not a pretty sight, Ladies;) I finally managed to "fanagle" the egg from his mouth and the pictures you see above are "after" the fact. I tried best to hide the crack marks! LOL Gotta love it;)

March 17, 2007


"St. Patrick's Day is an enchanted time -- a day to begin transforming winter's dreams into summer's magic!" Adrienne Cook

March 16, 2007

March 10, 2007

Make Something "New" Out Of Something "Old!"
I don't know about you but I love to go to craft shows! One of the reasons I love to go is I can come away with the best ideas without ever having spent a cent! I wanted to share with you the following craft idea because it is so cute and easy! It takes maybe five minutes to make which is my kind of craft;)
Here is what you need:

artificial flowers

ribbon

fingertip towel
Grater~ yes, I said a grater!! If you look closely at the handle you can see mine is all bent, it's over 25 years old;)
Directions:
1. Take grater and turn upside down. (handle should be at the bottom)
2. Take flowers and put in opening at the top of the grater. Arrange to your liking.
3. Take ribbon and tie at the top right below the flowers.
4. Place fingertip towel through handle.
5. Hang on wall using hole that is already provided in the grater.
6. Enjoy your new decoration that you created!

March 08, 2007

Jelly Bean Fun

Nothing says Spring more to me that a bag of beautiful jelly beans. Now granted, they are yummy to eat, but they are also a wonderful way to decorate inexpensively around your home!


An old mason jar filled with jelly beans and bright spring ribbon to tie it up! Doesn't it just "pop"with color?


Here I used little candle holders with tea lights nestled on top. In the fall they contained popcorn (unpopped) and candy corn, at Christmas they had cranberries, and in Feb. I used candy hearts. I did the same thing for the large hurricane globe below.


It's hard to tell but this is a big hurricane globe that has a large candle inside. If I could give one helpful decorating suggestion it would be to try and find a hurricane globe either at a yard sale, thrift store or just buy one. It is one of the most versatile decorating pieces you can have because it is so easy to change the look to reflect a season or a mood. In the summer I plan to put sand in it and have seashells gathered around. The same holds true with small votive holders! Another helpful suggestion is to have a ribbon box that you can keep all of your ribbon in. Every season I open my box and I have the appropriate ribbon to use! I'll be back tomorrow with one more Spring decorating idea. Hope to see you then! In the meantime, I hope you have some jelly bean fun of your own!

March 07, 2007

More Spring Corners!


I love to change out the accessories for the different seasons. One of my favorite places to do this is on my mantel. The white tin bucket on the hearth is a wonderful way to celebrate the changing seasons. It is fun picking out different flowers that coordinate with the seasons. I get all of my flowers at the Dollar Tree as well as the plates that were on the dining room table yesterday! You CAN create a warm and cozy atmosphere in your home with very little money and a little creativity!


This is the crackle finish bunny that "hopped" home with us the other day!

The picture doesn't show up well, but the eggs are nestled inside a vintage pickle dish!


I have another tin bucket the sits on our piano that I change with the seasons, as well! The bunny and bear have found a comfy spot to sit and enjoy the day:)

March 06, 2007

Spring Welcome
Dining Room

Our dining room is one of the first rooms you see when you enter our home. I always want it to look pretty not only for guests, but more importantly for us! As you can see I love to incorporate my decorating to reflect the different seasons. In case you are wondering, yes, Mr. P and I eat in our dining room every night!

March 04, 2007

Springtime Welcome
Our Home Place

This is my favorite wreath because it has my favorite flower the daffodil on it as well as my favorite color, yellow. Isn't is cheerful?!


Look at that gorgeous blue sky! You can tell it is March because it is so windy. I had a hard time getting my flag to "stay still" for the picture!


The slate says "Welcome" to all who enter!

There's my favorite flower again!

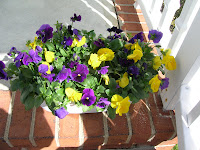
I had to show the pansies again because they are just so pretty and "springy!" I'm so glad you could visit me! Please come again!!